1、提示 Starting in local only mode. 仅本地模式时,具体代码如下:
1664285252: Warning: Can't start in daemon mode in Windows.
1664285252: mosquitto version 2.0.15 starting
1664285252: Using default config.
1664285252: Starting in local only mode. Connections will only be possible from clients running on this machine.
1664285252: Create a configuration file which defines a listener to allow remote access.
1664285252: For more details see https://mosquitto.org/documentation/authentication-methods/
状态:本地127.0.0.1可以正常连接,但是无法通过WAN连接,即使把防火墙关闭也不行,原因仅仅是程序没有开启监听。
解决方法:
先修改软件安装目录中的配置文件mosquitto.conf然后加载配置文件来启动服务器。
1、配置端口号,编辑mosquitto.conf,搜索listener去掉行首的#并加上端口号,示例端口为1883
2、启用匿名访问,若不允许匿名访问则只有添加客户端鉴权信息才能接入。为简化测试我们启用匿名访问:将mosquitto.conf里的allow_anonymous选项改为true并保存
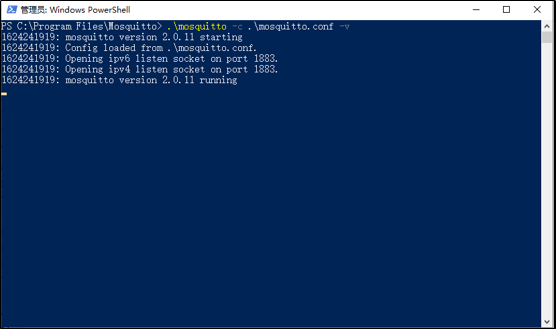
3、加载配置文件启动服务器测试,执行命令mosquitto.exe -c mosquitto.conf -v,此时LOG上已经没了Starting in local only mode且非本地客户端可以正常接入了
2、常用的软件
MQTT服务端软件:https://mosquitto.org/download/
MQTT客户端软件:https://mqttx.app/
3、 allow_anonymous:false,禁止匿名访问的时候,提示Not authorized
1、配置文件中搜索
#password_file将其修改为password_file pwfile.example,这里是设置账户密码文件位置,默认是根目录下的pwfile.example,也可以修改为其他路径,大约在531行。
2、创建用户名和密码
在安装路径下,按住shift,右击,选择在此处打开PowerShell窗口,输入下列指令:
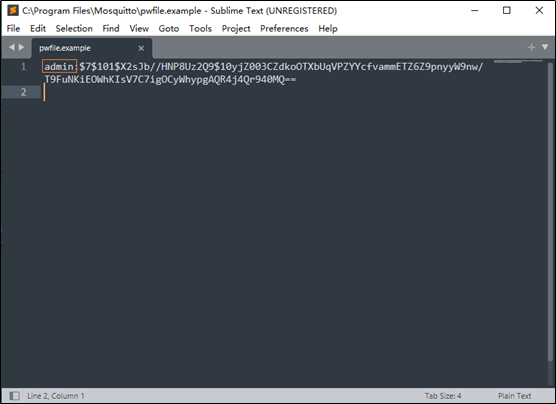
./mosquitto_passwd -c pwfile.example admin该指令是指添加一个叫admin的账户,会提示连续两次输入密码,完成后,即表示账户创建成功。此时打开pwfile.example文件,可以看到admin已经添加进去了。
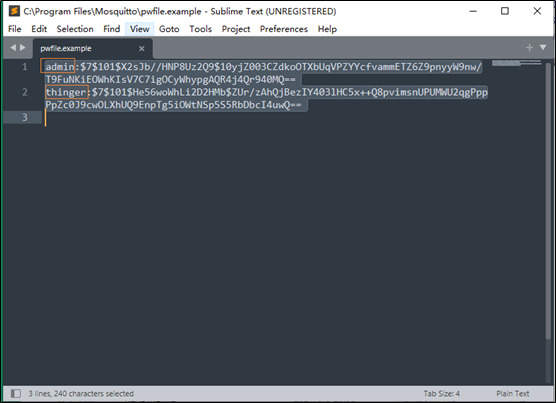
3、如果还想追加一个用户,可以继续执行该指令,但是要注意的是,要把-c去掉,如果仍然使用-c,会把第一个创建的用户覆盖掉,下图可以看到追加用户成功。
4、配置完成后,就可以启动了,重新打开一个PowerShell窗口,通过.\mosquitto.exe程序配合相关指令参数实现。
其中常用的几个指令参数如下:
-c 加载指定的配置文件,即mosquitto.conf
-d 将服务放在后台执行
-p 监听指定端口的代理,并且不建议与-c选项一起使用
-v 启用详细日志模式
我们使用指令
\mosquitto -c .\mosquitto.conf -v表示以mosquitto.conf作为配置文件运行,同时开启详细日志模式。
来源:https://zhuanlan.zhihu.com/p/410852315